Previewing preso modes
Related links:
Presentation modes
Related links:
Preview directions:
- Open the
Slidestab - Set viewing mode to
Present (Master)

Activate full-screen mode:

Prep
Related links:
Preview directions:
- Open the
Slidestab - Set viewing mode to
Present (Master) - Set presentation mode to
Prep

Present
Related links:
Preview directions:
- Open the
Slidestab - Set viewing mode to
Present (Master) - Set presentation mode to
Present
Review
Related links:
Preview directions:
- Open the
Slidestab - Set viewing mode to
Present (Master) - Set presentation mode to
Review

Remote Preso
Related links:
Preview directions:
- Open the
Slidestab - Set viewing mode to
Present (Master) - Set presentation mode to
Present
- Open the TelePreso tab in the right panel

- Click to "Open in browser"
- Select the
TelePresooption
- Navigate through the content using the CDK
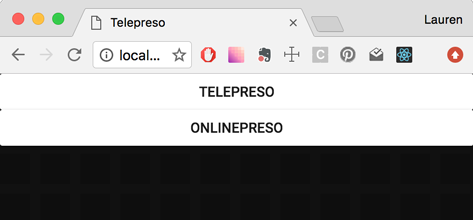
Share
Related links:
Preview directions:
- Open the
Slidestab - Set viewing mode to
OnlinePreso

Thumbnail
Related links:
- Thumbnails overview
- Thumbnails testing guide
animation-completeclass guide- Adding fixtures guide
- Generating adjunct subslide thumbnails guide
Preview directions:
- Open the
Slidestab - Set viewing mode to
Screenshot (Thumbnails) - Set dummy context and feeds to
Fixture

PDF
Related links:
- PDF exports overview
- PDF testing guide
- Preparing content for PDFs guide
animation-completeclass guide
Preview directions:
Unfortunately, it is not possible to generate a PDF using the CDK, however, we can preview the slides in a similar state to which will be viewed by the screenshotter.
- Open the
Slidestab - Set viewing mode to
Screenshot (Full)

PresoManager
Related links:
- PresoManager overview
- PresoManager testing guide
- Deck-wide (PresoManager) editable content guide
- Adding fixtures guide
Preview directions:
- Open the
Slidestab - Set viewing mode to
PresoManager - Set PresoManager mode to
Edit mode - Set dummy context and feeds to
Fixture

- Switch between
Edit modeandPreviewfor each slide

If you are connected to a server with saved companywide values, those values will be shown in the fields; otherwise, the default text and images will be shown.
Changes that are made to companywide editable fields in the CDK will not be saved and will not appear in the app. The fields in the CDK are editable for demonstration and development purposes only.
Companywide editable fields will appear as they do in the app - text fields will have blue outlines, image fields will allow you to select an image, and so on.
Empty Preview
Related links:
- Empty preview overview
- Empty preview testing guide
- Adding fixtures guide
- Adjunct subslide without data guide
Preview directions:
- Open the
Slidestab - Set viewing mode to
Empty Preview - Set dummy context and feeds to
Fixture

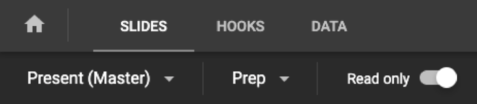
Read-only
Related links:
Preview directions:
- Open the
Slidestab - Select your chosen preso mode
- Activate the
read-onlytoggle
Offline mode
Related links:
Replicating offline mode
Unfortunately, offline mode replication is not officially supported in the CDK. In order to reproduce offline mode, you will need to take the following steps:
- Disconnect your machine from the internet
- Manually update the CDK body class from
onlinetooffline - Toggle the
Bridge.Status.isOnlineflag - Trigger the Bridge
connectionChangedevent
Our suggestion to more effective achieve steps 2 - 4 is to write a function that can be triggered from the dev tools console that executes the required actions.
For example:
const toggleConnection = (status) => {
	// Toggle body class
	$("body").toggleClass("online", status);
	$("body").toggleClass("offline", !status);
	// Toggle Bridge status flag
	Bridge.Status.isOnline = status;
	// Trigger connectionChanged event
	$("#slideshow").trigger("connectionChanged", status);
};
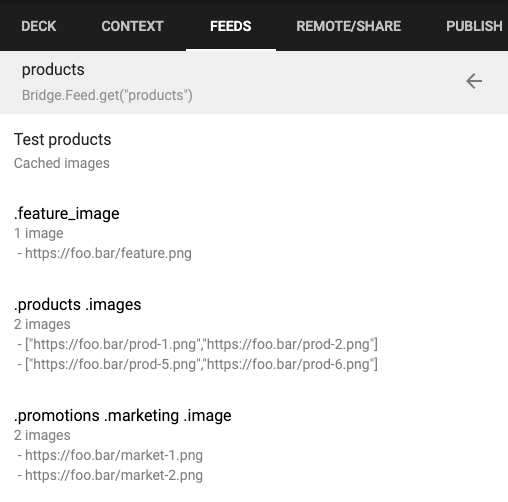
Reviewing cached feed images
To review your feeds image cache selections in the CDK:
- Open the
Slidestab - Open the
Feedstab in the RHS panel - Select the relevant feed
- Input your test data
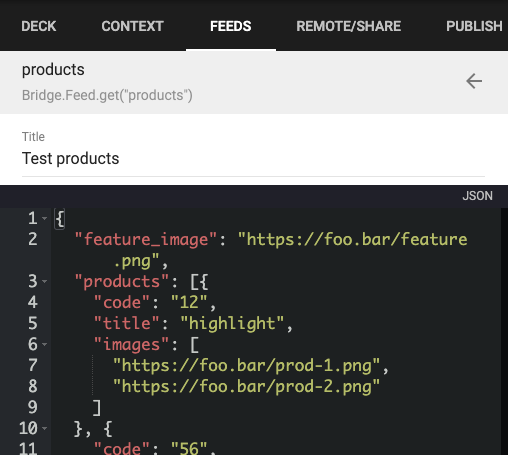
- Click the
offline imagesicon

- If your selections were mapped correctly, you will see a list of all of images in your test data that would be cached if this were a live feed fetched at preso creation