Preso modes
Related links:
This section will take you through what to look for when testing each of LivePreso's preso modes, with links to how to preview each mode in the CDK.
Always be sure to test in both the CDK, and against an uploaded deck version using the LivePreso app. Even though the CDK does an exceptional job of recreating each of the modes available in all stages of a preso, there can still be discrepancies - particularly with screenshots (thumbnails & PDFs).
Presentation modes
Ensure that you test your content in fullscreen mode as well. We use CSS
transform to scale a preso into fullscreen mode, this may adverse
affects on some of your z-index styles.
Prep
Ensure all per-preso editable slides are editable and displaying their expected UI. In many cases, other than editable slides, the prep state is given the same business rules as any other state. Some examples where it can differ are: Removable assets which the client wants only available to salespeople in Prep, forms & calculators that are intended to be setup in Prep, then locked for Present.
Present
This is the standard view when testing your content. Ensure all expected functionality, animation and interactivity is behaving as intended.
Review
As with Prep, Review generally reflects similar rules to Preset. An example where this may differ is if the client wishes the salesperson to no longer make changes after the presentation time has passed (setting the preso to Review).
Remote Preso
Throughout your remote Preso testing, take special note of any interactivity that should be synced on both the master (CDK) and client (browser) sides - eg. calculator entries & results, dropdown selections, DOM updates etc. Also take note of any business rules and ensure they are being followed as expected - eg. on video slides show a message on master that viewers must click play in their respective browsers, do not show this message to the client.
Share
Ensure all intended share functionality is available, and any business rules for your content are being applied as expected (eg. shares may not have ability to make changes)
Thumbnail
When testing thumbnails, ensure all business rules are enacted (eg.
interactivity buttons are visible) and slide animation has been
fast-forwarded to its final frame using the slide's animation-complete class.
Similar to Empty Preview, the thumbnail screenshotting process has no association to a preso, and as such will be using fixtures data.
- Previewing thumbnails in the CDK
- Thumbnails overview
animation-completeclass guide- Adding fixtures guide
- Adjunct subslide without data guide
PDF
When testing for PDF screenshotting, ensure all business rules are enacted (eg. interactivity buttons are hidden, disclaimers are open, any slides with particular PDF designs are displayed etc.) and slide animation is stopped on every slide at its final frame.
- Previewing PDF views in the CDK
- PDF exports overview
- Preparing content for PDFs guide
animation-completeclass guide
PresoManager
It is recommended that you test out a few different input values (eg. small amount of text, heaps of text) to ensure nothing breaks. There is an amount of user responsibility for ensuring changes they are making look appealing, however users should not be able to break the general functionality of the slide or drastically alter the slide's layout simply by entering too much/too little text.
- PresoManager in the CDK
- PresoManager overview
- Deck-wide (PresoManager) editable content guide
- Adding fixtures guide
Testing in the CDK
See previewing PresoManager in the CDK
If you are connected to a server with saved companywide values, those values will be shown in the fields; otherwise, the default text and images will be shown.
Changes that are made to companywide editable fields in the CDK will not be saved and will not appear in the app. The fields in the CDK are editable for demonstration and development purposes only.
Companywide editable fields will appear as they do in the app - text fields will have blue outlines, image fields will allow you to select an image, and so on.
As always, the CDK behaviour of these fields is expected to be very similar to the behaviour in the app, but it is advised that you test both.
While developing, it is recommended that you test out a few different input values (eg. small amount of text, heaps of text) to ensure nothing breaks. There is an amount of user responsibility for ensuring changes they are making look appealing, however users should not be able to break the general functionality of the slide or drastically alter the slide's layout simply by entering too much/too little text.
Following the above direction, review all linked elements and ensure edit mode behaves as expected for each slide - keep in mind that any elements requiring user interaction in edit mode must be tagged accordingly.
Testing in the LivePreso app
Upload a deck with editable fields / images and set its approval status
to Approved, then accessing PresoManager in the app. It is
recommended that you test out a few different input values (eg. small
amount of text, heaps of text) to ensure nothing breaks. There is an
amount of user responsibility for ensuring changes they are making look
appealing, however users should not be able to break the general
functionality of the slide or drastically alter the slide's layout
simply by entering too much/too little text.
Following the above direction, review all linked elements and ensure edit mode behaves as expected for each slide - keep in mind that any elements requiring user interaction in edit mode must be tagged accordingly.
Changes that are made to companywide editable fields while testing in the LivePreso app will be saved. Ensure that you do not publish any changes while testing on a production server.
Empty Preview
As well as testing all slides are rendering as expected - including adjunct subslide previews, use this as an opportunity to make sure your fixtures data is up to date with the current deck requirements.
- Empty preview in the CDK
- Empty preview overview
- Adding fixtures guide
- Adjunct subslide without data guide
Read-only
Related links:
When content is being viewed in read-only mode, updates to the preso are no longer captured and saves to the context are prevented in the app and on the server. Test for any interactive elements, inputs etc. that attempt to update the context while in read-only mode, as these will revert on subsequent visits when the slide re-fetches data from the locked context.
In most cases, you will want the same functionality applied to read-only mode as review mode. If this is the case, you can save quite a bit of development time by grouping the modes together when developing your logic and styles.
Examples to consider while testing:
- Editable/interactive elements that previously saved to the context are disabled
- Any buttons that fetch new data are disabled
- etc.
Testing in the CDK
See reviewing read-only mode in the CDK.
Testing in the LivePreso app
If the handover feature is enabled on your instance, you can test read-only mode in the SP app by following these steps:
- Create a new preso
- Handover the preso to a team member
- Go to the customers page and select your chosen customer
- Select the preso you handed over
- Review the preso
If you have followed the steps correctly, you will have limited functionality (ie. cannot "Start preso" or "share" etc.) and see the following "read-only" mode lockup on the preso details page:
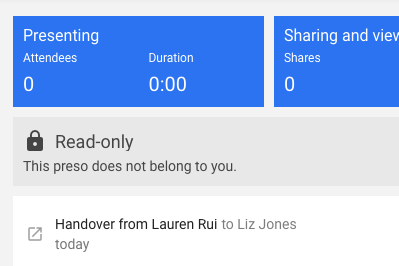
And that's all for read-only mode! Continue on to learn about designing and developing content for offline mode.
Offline mode
Related links:
Your content will need to be tested in offline mode before it is released. This is to ensure any offline mode specific logic you have developed is functioning as intended, and help you identify any additional logic that may be required.
Testing in the CDK
See previewing offline mode in the CDK.
Testing in the LivePreso app
There are two ways that you can test offline mode in the LivePreso app.
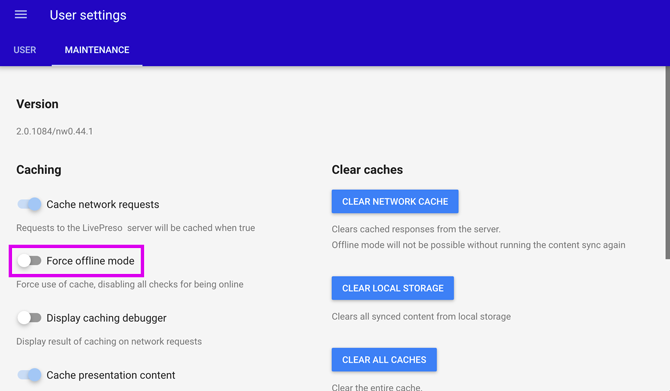
Offline mode toggle:
- Open the side menu
- Select "User settings" at the bottom of the menu

- Navigate to the "Maintenance" tab
- Toggle "Force offline mode"
Manual disconnect:
Disconnect your machine by unplugging from your modem/router or deactivating your WiFi.
When using either method, you can confirm that the LivePreso app has switched into offline mode by the appearance of an offline indicator icon in the top right corner:

While "Force offline mode" is a very handy toggle, it does not produce as reliable a reproduction of offline mode as physically disconnecting your machine from the internet.