Testing tags
Related links:
Tags
Tags are added to sections, slides and the Welcome slide in the project.yaml, and can be added to/removed from slides in PresoManager. They can be used to:
- Apply pre-determined LivePreso functionality (e.g.
off-by-default,not-for-pdf-export) - Search for tagged slides in the app
- Apply custom behaviour determined by the deck
The CDK Hooks tags tab will allow you to test the third point above - using tags to apply custom deck behaviour.
Using the Tags Tab
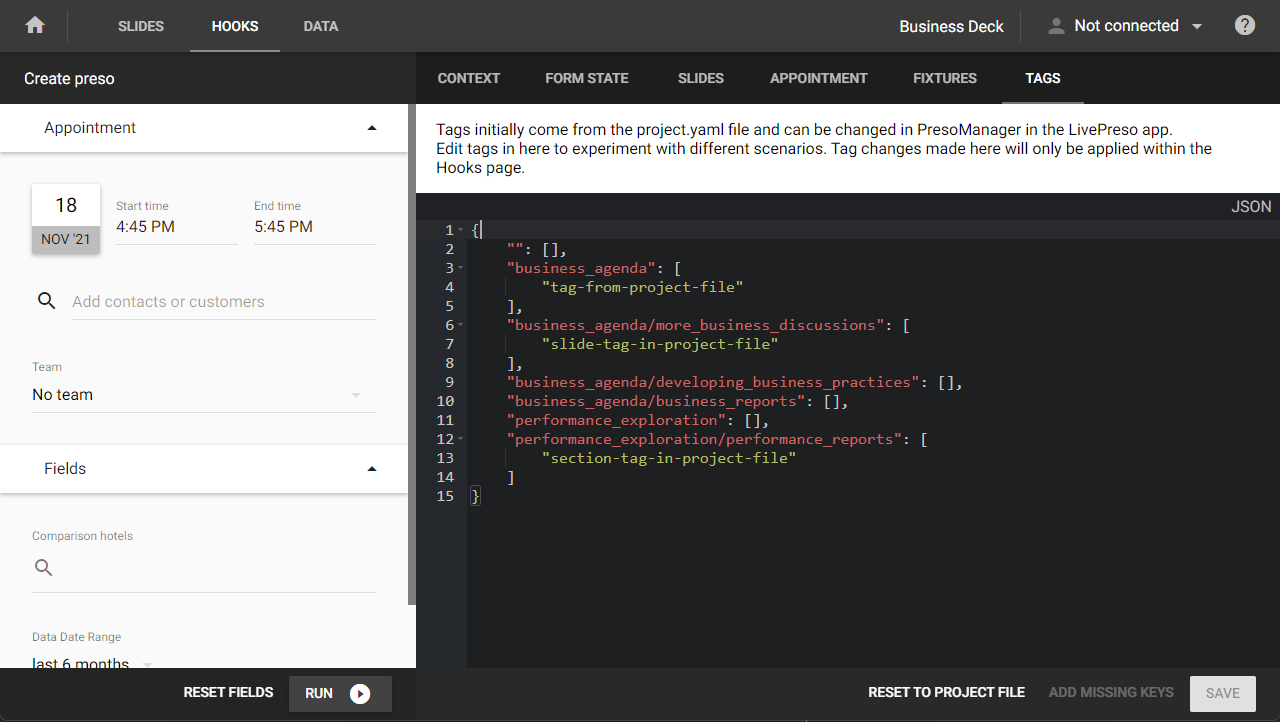
The tags tab in the Hooks section of the CDK will allow us to experiment with applying tags to slides. When tags are added here and saved, they will be used by the Hooks appointment simulator. They will be available during selections when the appointment is created or edited, and they will be present in the presentation data in Bridge.
The tags tab is only for experimentation with tags - it will not alter the project.yaml file or save tags to the server.
Note that if a tag is specified for a slide in the tags tab, and there are also tags added to that slide in the project.yaml, only the tag(s) in the tags tab will be used. Here's a breakdown of this behaviour:
- If there are no tags in the tags tab, all of the tags data will be taken from the project.yaml
- If some sections/slides have tags in the tags tab, their tags will only come from the tags tab. All other sections/slides without data in the tags tab will get their tags from the project.yaml
- If all of the sections/slides have their keys referenced in the tags tab then none of the tags specified in the project.yaml will be used
This may seem like a very convenient way to test the behaviour of LivePreso tags like "off-by-default" or "prep-only". Unfortunately, this functionality is not yet available in the CDK; the tags tab is best used to test developer-added tags.
Tag format
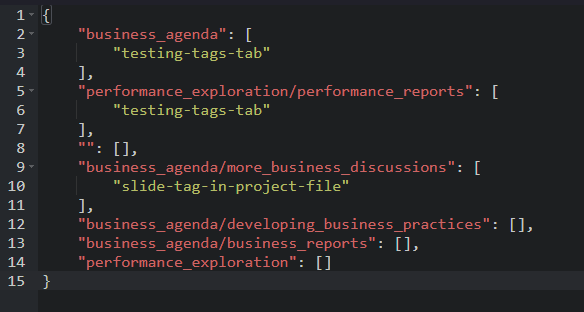
The data added will need to be in a specific format. This is the basic structure of tag data:
{
	"": [],
	"business_agenda": [
		"section-tag"
	],
	"business_agenda/more_business_discussions": [
		"slide-tag"
	]
}
- The "" entry is for the Welcome slide. This is the same for every deck
- The section and slide keys used here are computed keys
- A key must always be encased in quotation marks and can only have an array assigned to it. If this format is incorrect then you will see one of the validation errors at the bottom of the JSON field
Validation
There are two kinds of validation used in the JSON field, both of which are applied when the field is saved. Validation warnings and errors will be shown at the bottom of the field in a yellow or red bar, and syntax errors will be indicated at the start of the line containing the error.
Errors
Errors indicate that the syntax is incorrect and will prevent the field from saving:
![]()

Warnings
Warnings are intended to help the content developer use the feature and guide the user towards adding missing keys or removing unused keys. They can safely be ignored.
![]()
![]()
Reset to project file

The "Reset to project file" button replaces everything in the JSON field with a complete set of keys and tags copied from the project.yaml. This button will be most useful to you if you're starting with a completely blank slate or you want to wipe out all of your changes.
Note that the changes are not immediately saved after clicking the button! If you've clicked it by mistake you can use the "undo" function to revert the changes, or you can navigate to a different screen in the CDK and back to reset the field to its last saved state.
Add missing keys

If you've started adding keys from the project.yaml and you want to easily add the rest of the keys, you can use the "Add missing keys" button to achieve this. The button will automatically save the field before and after adding the keys, so you will need to resolve syntax errors before using it.
Before using the "Add missing keys" button:

After using the "Add missing keys" button: