Preso modes
Related links:
One of the determining features of LivePreso are the many modes that content can appear in. It is important that each mode is taken into consideration when designing and developing content.
Viewing modes
A preso can be viewed in a number of viewing modes, these generally follow the lifecycle of a preso. To get you acquainted, we'll take you through a couple of real-world user stories:
Simon the sales person
Simon creates a preso for his client Olivia. First up, Simon "preps" the preso, populating some editable slides and adding a custom slide . Olivia isn't able to join Simon in person for the meeting, so he sends her a "remote" link so she can follow along from her own browser. Simon phones Olivia at the scheduled appointment time and "presents" the preso. During the presentation Simon find he needs to pivot to a different slide, he opens the slide overview and uses the "thumbnails" to help him recognise which slide he needs to jump to.
After the preso, Simon "shares" an online copy with Olivia for her to review in her own time. Olivia accesses the share via a link in her own browser, once she's finished she clicks a button to generate a "PDF export" - sent straight to her email inbox.
Several days later, Simon is preparing for a follow-up meeting with Olivia. He returns to the previous preso and "reviews" it, taking note of what they last discussed before creating a new preso.
Martin the marketing manager
Marketing manager Martin jumps into "PresoManager" to make some global changes to the business deck. Martin starts by previewing a bespoke slide built by their internal content development team, he makes a couple of copy changes to the slide and updates an image. Next, he creates a new slide using a template, also developed by the content team. The business has a couple of limited time promotions coming up, so he drops in a temporary slide and breaks for lunch.
Tina the team manager
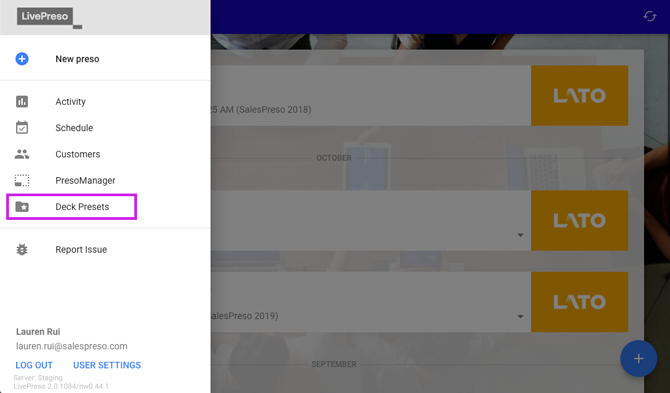
Tina manages a new team who are going to be using a small subset of the business' main deck for their presentations. Tina opens the LivePreso app and navigates to the Presets page. She is presented with a slide sorter view, populated with "thumbnails" to help her navigate the deck. From here she reorders and toggles slides on/off, creating the perfect default deck for her team. In order to confirm a couple of the slides, she opens them up in a preview - this is considered an "Empty Preview" as there is no preso associated with the content at this time, and hence no relevant data.
Once she's happy, Tina saves the new configuration as a company owned preset.
Now that you're thinking in modes, we'll take you through each one in detail, what functionality you might apply and some common use-cases.
Presentation
The primary viewing mode of the LivePreso application, presentation. This is the mode users see when preparing, presenting and reviewing a preso while logged into the LivePreso app.
The LivePreso app's body tag gains the classes master & omnipreso.
<body class="master omnipreso">
	<!-- LivePreso -->
</body>
Where applicable:
- LivePreso user is prepping, presenting or reviewing a preso (live or remote)
Example of use:
- Grant interactivity permissions in a remote preso
- Trigger Bridge events to sync the client in a remote preso
Presentation modes
An additional layer to the presentation are the presentation modes. There are three different presentation modes: "prep", "present" and "review", each reflects a different stage in the presentation life-cycle.
Here are a couple of examples of when you may want to apply specific logic and styles based on the current presentation mode:
- Enable content editing in "prep"
- Limit functionality in "present"
- Disable saving to the context in "review"
Prep
Prep mode is intended as a preparatory stage of the presentation for the user, where they can review the data fetched for their preso, update slide selections, make edits where required etc. Essentially, prep their content.
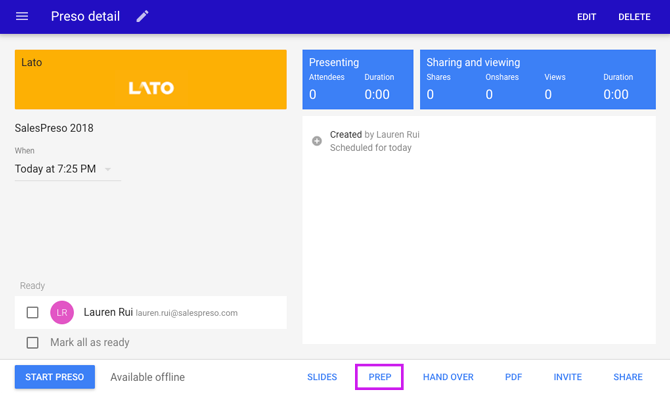
Available as a "prep" button on the LivePreso UI presentation page before and during the presentation's scheduled time. As soon as that time has passed and the preso is deemed complete, this "prep" button is replaced with a "review" button.
The LivePreso app's body tag gains the class preview.
<body class="preview">
	<!-- LivePreso -->
</body>
Where applicable:
- Prepping a presentation from the LivePreso app
- Prepping individual slides in the Slide Sorter
Example of use:
- Allow editing of a slides' content before presenting to the client
- Allow predetermined elements to be removed from a slide
- Display prep-only slides to help the user prepare (eg. customer research, checklists etc.)
Other mode features:
- Marker slides must be checked off in prep before present mode can be initiated
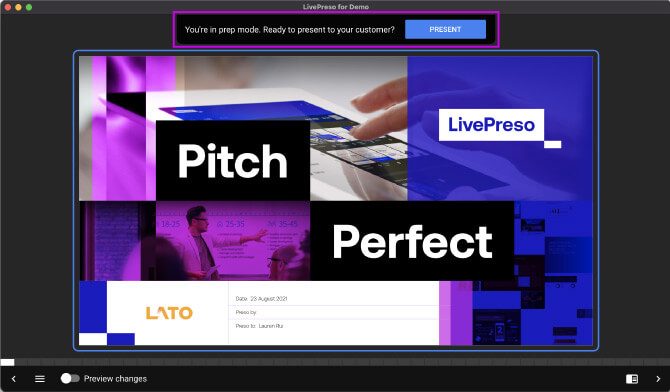
- Prep mode flag is displayed above the content area
Present
This is where the magic happens, when the user presents their preso to the client. During present mode, the user can present both in person, and remotely simultaneously.
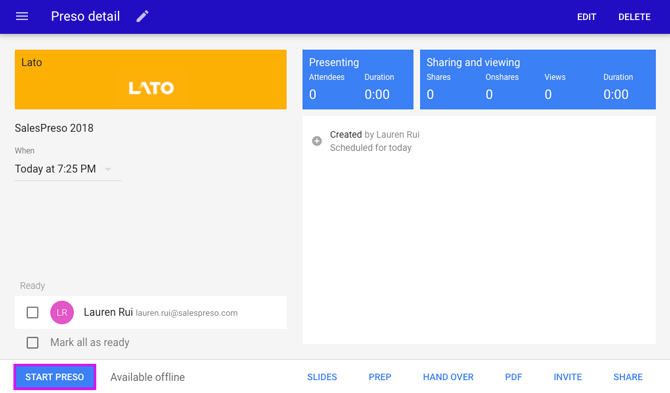
The user clicks "Start Preso" from the LivePreso UI.
The LivePreso app's body tag gains the class present.
<body class="present">
	<!-- LivePreso -->
</body>
Where applicable:
- Presenting a preso from the LivePreso app
Example of use:
- Prohibit editing of content when presenting - if required
- Hide editing tools when presenting - if required
- Activate editing on slides that should only be completed when presenting to a client
- Sync interactions from the user to the client with remote preso
While hiding editability is a standard functionality, we find the most engaging slides are still interactive and "editable" to some degree. For example, an interactive graph that can be explored with all interactions synced from master to client over remote preso, or a calculator that the user can populate with the client and see live results.
Review
Once the preso is over it switches into review mode, giving you the power to lock down editability if required, or even add another layer of functionality specific to the your client's business requirements (maybe a way the user can collate notes after their appointment is finished?).
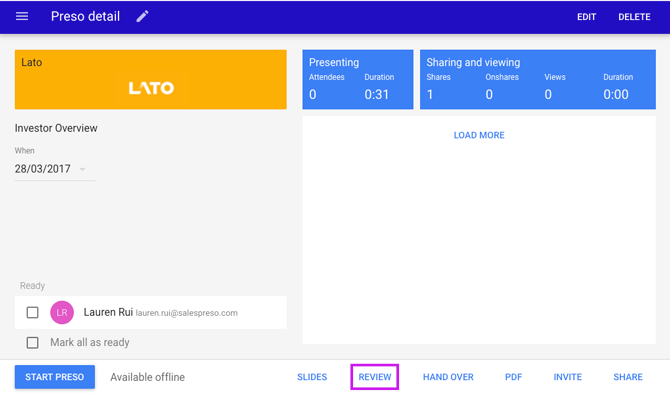
Becomes available once the scheduled time for the presentation has passed and the preso is deemed complete. User can no longer prep slides, and the "prep" button in the LivePreso UI presentation page is replaced with "review".
The LivePreso app's body tag gains the class review.
<body class="review">
	<!-- LivePreso -->
</body>
Where applicable:
- Reviewing a completed presentation from the LivePreso app
Example of use:
- Disallow any further editing of the content
Remote
Related links:
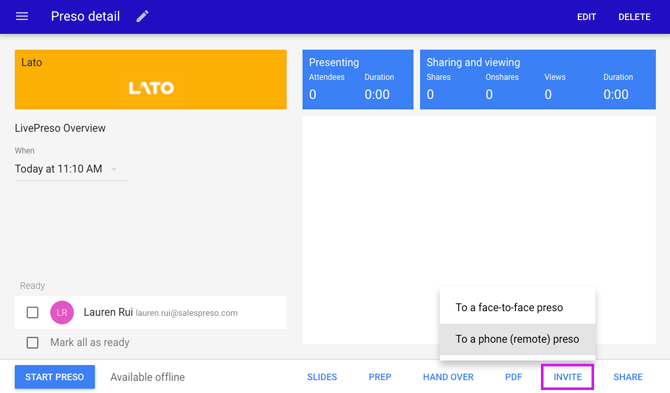
One of the biggest features of LivePreso, remote preso mode. Clients are invited to a remote preso using the "Invite" button and selecting "To a phone (remote) preso". From there, the client is sent a link which they are to open in their own browser at the time the presentation is scheduled to start.
Using our websockets-based system for master-client syncing, this functionality gives us pixel perfect content with low bandwidth usage, client interaction development possibilities and tracking! The ultimate in client engagement.
While the master is presenting, Bridge events are used to send data and commands between the master and client sides of the presentation, keeping interactions, data updates, DOM redraws etc. in sync throughout the presentation.
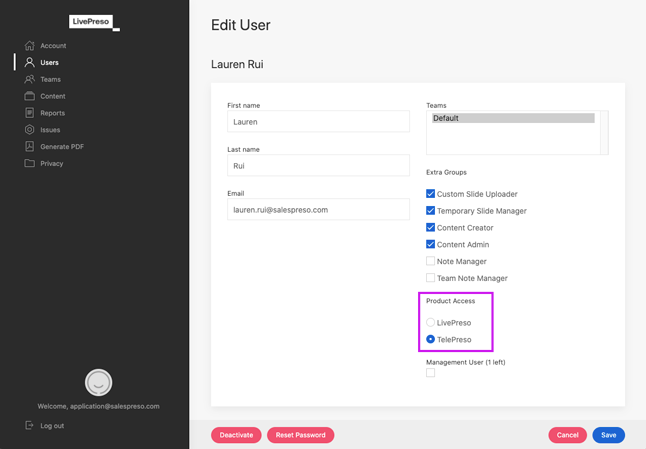
A user's ability to create remote presos is determined the Product Access permission in HQ.
Master
When presenting to a remote client from the LivePreso app, the master
& omnipreso classes are applied to the app's body tag - the same
classes as applied in a face-to-face preso, see the
presentation overview.
<body class="master omnipreso">
	<!-- LivePreso -->
</body>
Where applicable:
- Presenting a remote preso as a client
Example of use:
- Send data and render commands using Bridge.Event to keep clients in sync
- Prevent interactions that are to be undertaken by the client
Client
When viewed from the client link, the app's body tag gains the classes
client. This can be used to update styling, and block or enable client
interaction as required.
<body class="client">
	<!-- LivePreso -->
</body>
Where applicable:
- Receiving a remote preso as a client (guided by a master from the app)
Example of use:
- Prevent interactivity that should only be triggered from master
- Allow for interactivity that is required by the client
- Send requests through Bridge to master for latest data (in examples where master is saving data to its context and sharing it with the client)
See the remote preso giude for further direction on developing for this mode.
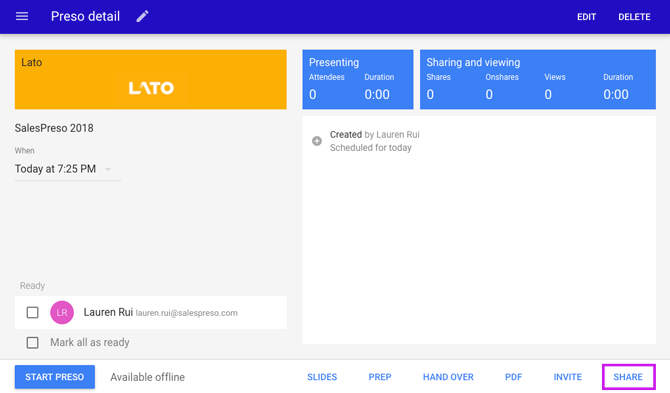
Share
Online copies of a presentation can be shared to clients from the LivePreso app by clicking the "share" button.
Online shares are navigated by the user in their own time on their own browser. Any saves to the context made in this mode will only last for that session. Unless additional functionality is developed that allows the client to push and fetch data from an endpoint, revisiting the link will reset the context and feeds data to what it was when the share was sent from the LivePreso app.
The LivePreso app's body tag gains the classes share_online.
<body class="share_online">
	<!-- LivePreso -->
</body>
Special attention needs to be given to cross-browser testing when developing for this mode.
See our list of supported devices and browsers.
Where applicable:
- Sending a share instance of the preso to a client to review in their own time
Example of use:
- Allow interactivity - where appropriate
- Disable the editing of elements that should only be updated in present mode
- Give the client the ability to submit data to an endpoint
PDF exports
Related links:
When screenshotting full-sized images of a presentation. Most commonly used when generating PDFs.
The LivePreso app's body tag gains the classes screenshot,
screenshot-full and share_online. The slide's article tag gains
the class animation-complete.
<body class="screenshot screenshot-full share_online">
	<!-- LivePreso -->
	<div id="slideshow">
		<article id="slide_id'" class="animation-complete">
			<!-- slide contents -->
		</article>
	</div>
</body>
Where applicable:
- Screenshotting full-sized images of a presentation/slide (generally for PDF use)
Example of use:
- Hide interactivity buttons
- Show disclaimers
- Apply PDF specific styling
- Switch slides for PDF-version where applicable
The modern chromium-based screenshot mechanism - when enabled via the relevant project.yaml setting, allows for greater control over how many pages appear in the PDF output. We also offer functionality that allows you to screenshot a single slide in various different states, for example, allowing you to capture all portions of a scrollable area, or hidden interactive elements.
See the preparing content for PDFs guide for more information.
Thumbnails
Related links:
When screenshotting a presentation for use as thumbnails.
The LivePreso app's body tag gains the classes screenshot,
screenshot-thumbnail and share_online. The slide's article tag
gains the class animation-complete.
<body class="screenshot screenshot-thumbnail share_online">
	<!-- LivePreso -->
	<div id="slideshow">
		<article id="slide_id'" class="animation-complete">
			<!-- slide contents -->
		</article>
	</div>
</body>
Similar to Empty Preview, the thumbnail screenshotting process has no association to a preso and as such will be using fixtures data.
Where applicable:
- Screenshotting a presentation/slide for thumbnail use
Example of use:
- Show interactivity buttons
- Hide disclaimer buttons as they crowd the thumbnails
- Swap data points using fixtures
- Generate stand-ins for adjunct subslides
PresoManager
Related links:
PresoManager is accessed through the LivePreso app by marketing managers. It allows them to update a deck by making copy and image changes to designated slides, add tags to and remove tags from slides, create new slides using templates and upload temporary slides.

As with Empty Preview, slides edited in PresoManager have no association to a preso, and as such will be using fixtures data.
Edit mode
When a user opens a slide in PresoManager it is automatically set to
edit mode. When in edit mode, the class edit-mode is applied to the
LivePreso app's body tag, giving us the opportunity to apply any
edit-mode specific logic and styles we need while a user is editing
the slide.
<body class="edit-mode">
	<!-- LivePreso -->
</body>
Where applicable:
- Editing a slide in PresoManager
Example of use:
- Add
edit-modespecific styles to the CSS/SCSS - Populate the slide with dummy data where fixtures won't suffice - eg. adjunct subslides
- Adding a toggle/dropdown to the slide to allow the user to freely access different states of the slide
If you decide to add some sort of toggle or other interactive device to a slide, you'll need to make sure it's active in PresoManager. Find out how in the Interactive elements in PresoManager guide.
Use-case example
A common request is to give the marketing managers access to different slide states that may otherwise be hidden behind a fieldset selection at preso creation, or a particular combination of dynamic data.
In this example, the deck's fieldsets offers a dropdown that allows for the selection of 1 out of 4 possible customer personas. These personas colour the slides in the generated preso, with text and imagery that switch in and out based on the selection. The marketing manager wishes to make updates to the copy and imagery for each of these personas, but as PresoManager doesn't include fieldsets logic, it's up to the content developer to make these fields visible.
As PresoManager (Companywide editable) elements need to be declared
in the HTML for the functionality to work, this can be done by building
all editable elements into the slide, and creating a dropdown of the
4 personas, activated by edit-mode that toggles the visibility of
the elements based on the current selection.
See the deck-wide editing guide for more information.
Preview mode
A user can toggle PresoManager into "preview" mode, this hides and disables all of the editable areas, allowing the user to preview what it'll look like once included in a deck.
Uses the same empty-preview class flag discussed
next.

Empty Preview
Empty Preview is applied at any point when deck content is being previewed without an association to a preso. The most common applications are:
- Presets
- PresoManager preview mode
When in Empty Preview mode, the class empty-preview is added to the
LivePreso app's body tag.
<body class="empty-preview">
	<!-- LivePreso -->
</body>
Where applicable:
- When previewing a slide without an associated preso
- Previewing a slide when creating/editing a preset
- Previewing a slide in PresoManager
Example of use:
- Add
empty-previewspecific styles to the CSS/SCSS - Populate the slide with dummy data where fixtures won't suffice - eg. adjunct subslides
- Add a toggle/dropdown to the slide to allow for access to different states of the slide
Read-only
Related links:
When a preso is in read-only mode, preso page functionality becomes limited, updates to the preso are no longer captured, and saves to the context are prevented in the app and on the server.
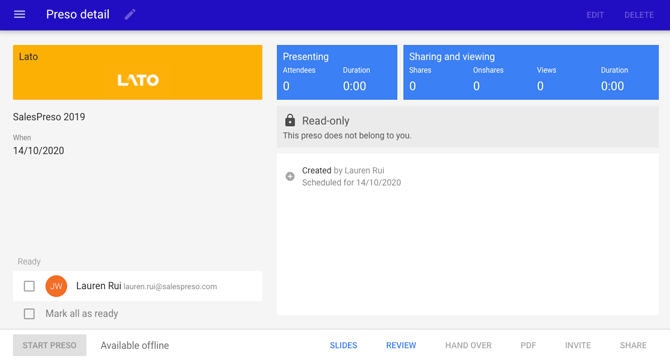
Read-only mode is activated in the following circumstances:
- A user is viewing a preso that doesn't belong to them
- Your client's instance is using the
no_snapshot_create_afterflag, which toggles read-only mode after a predetermined amount following the preso's end date - Preso has been locked by the app
Offline mode
It's possible for LivePreso users to be offline during a presentation - eg. visiting a client in a remote location with limited or no internet connectivity, a patchy internet connection, failed hot spot service etc. For all use-cases, we need to provide the best possible experience for our users when offline mode strikes.